Practical field guide
Plan an AI image edit that survives a careful review
A useful edit is more than a visually impressive first result. The source has details that carry meaning: a product silhouette, a person's identity, the angle of a room, a sign, or a specific reflection. The workflows below show how to separate the requested change from the evidence that should remain stable, then use the comparison and version tools to judge the result.
Case 01 Clean a real scene without making it look rebuilt
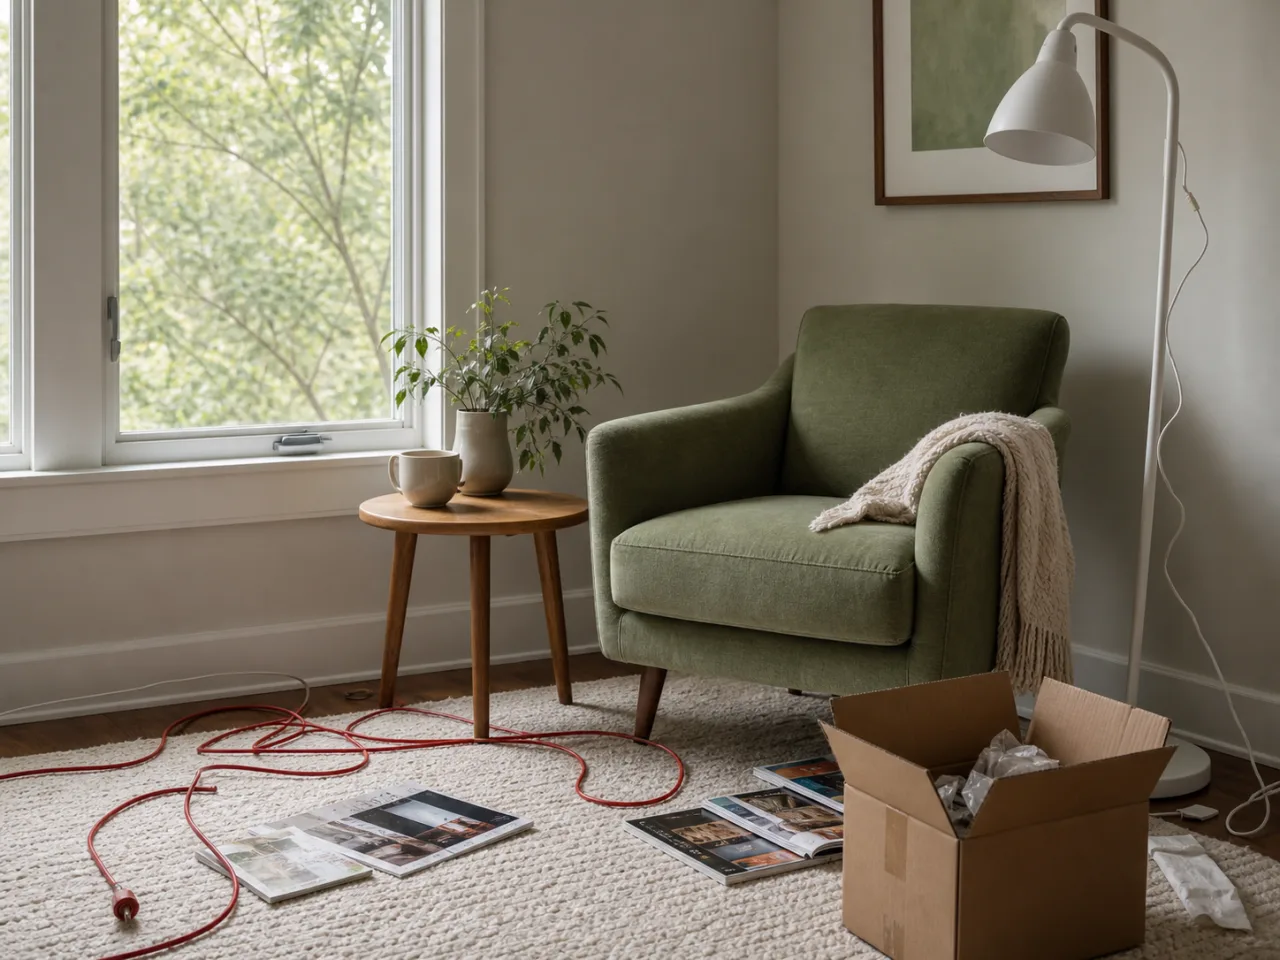
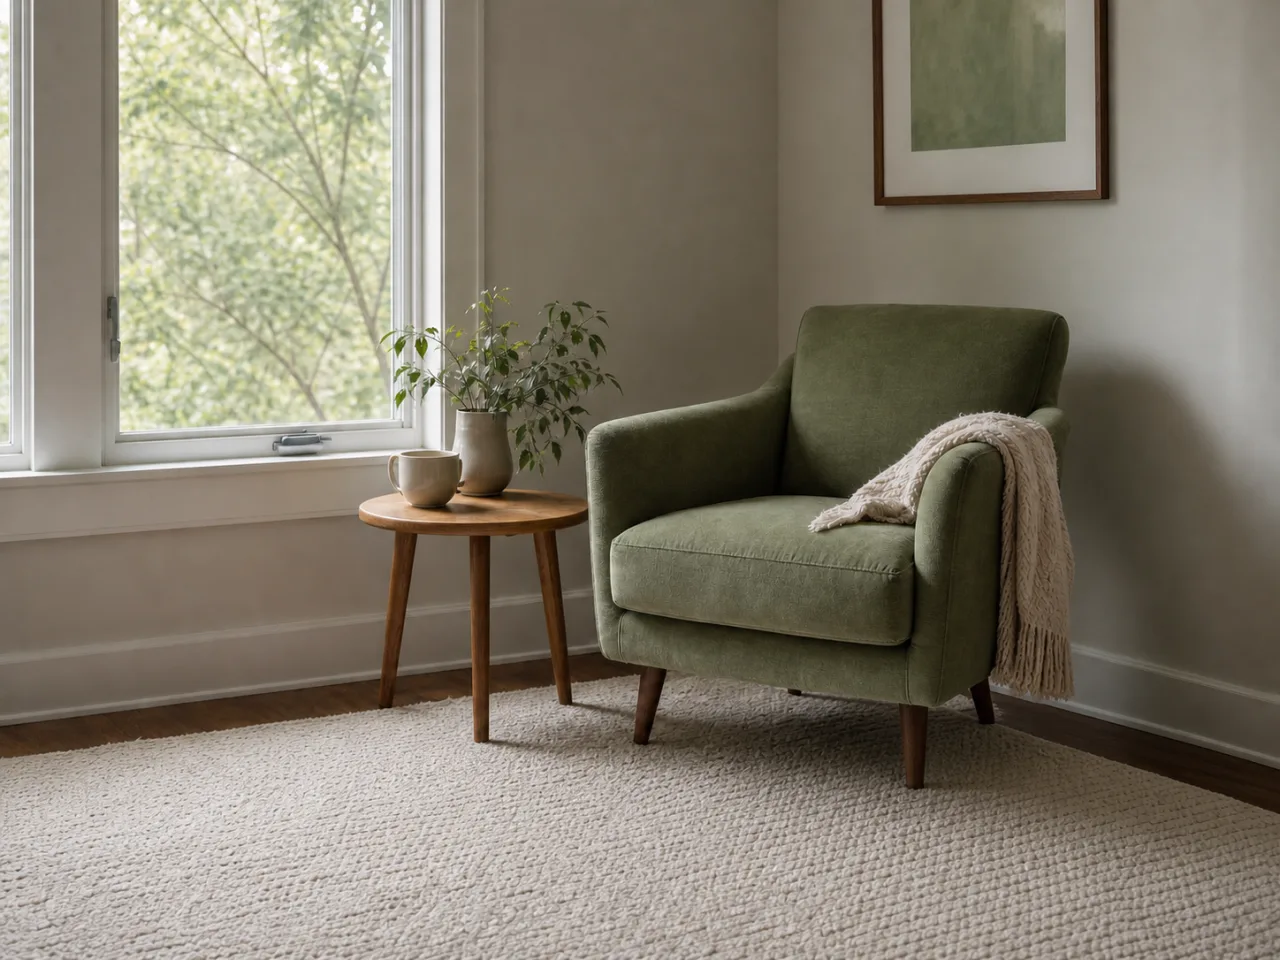
For the reading-nook example, the unwanted cable, box, packing material, lamp, and magazines sit on different surfaces. Naming the rug, floor, wall, and baseboard tells the editor what must be reconstructed behind each object. It also protects the chair, table, plants, window, and daylight from becoming accidental collateral changes.
PromptRemove the red cable, box, packing material, floor lamp, and magazines. Reconstruct the rug, wall, baseboard, and floor. Keep the chair, table, plants, window, perspective, and light unchanged.
Review: Compare the rug edge, floorboard direction, baseboard line, plant leaves, and chair legs. If one seam is wrong, mark that seam for a child version instead of asking the next prompt to clean the entire room again.
Case 02 Change atmosphere while protecting architecture
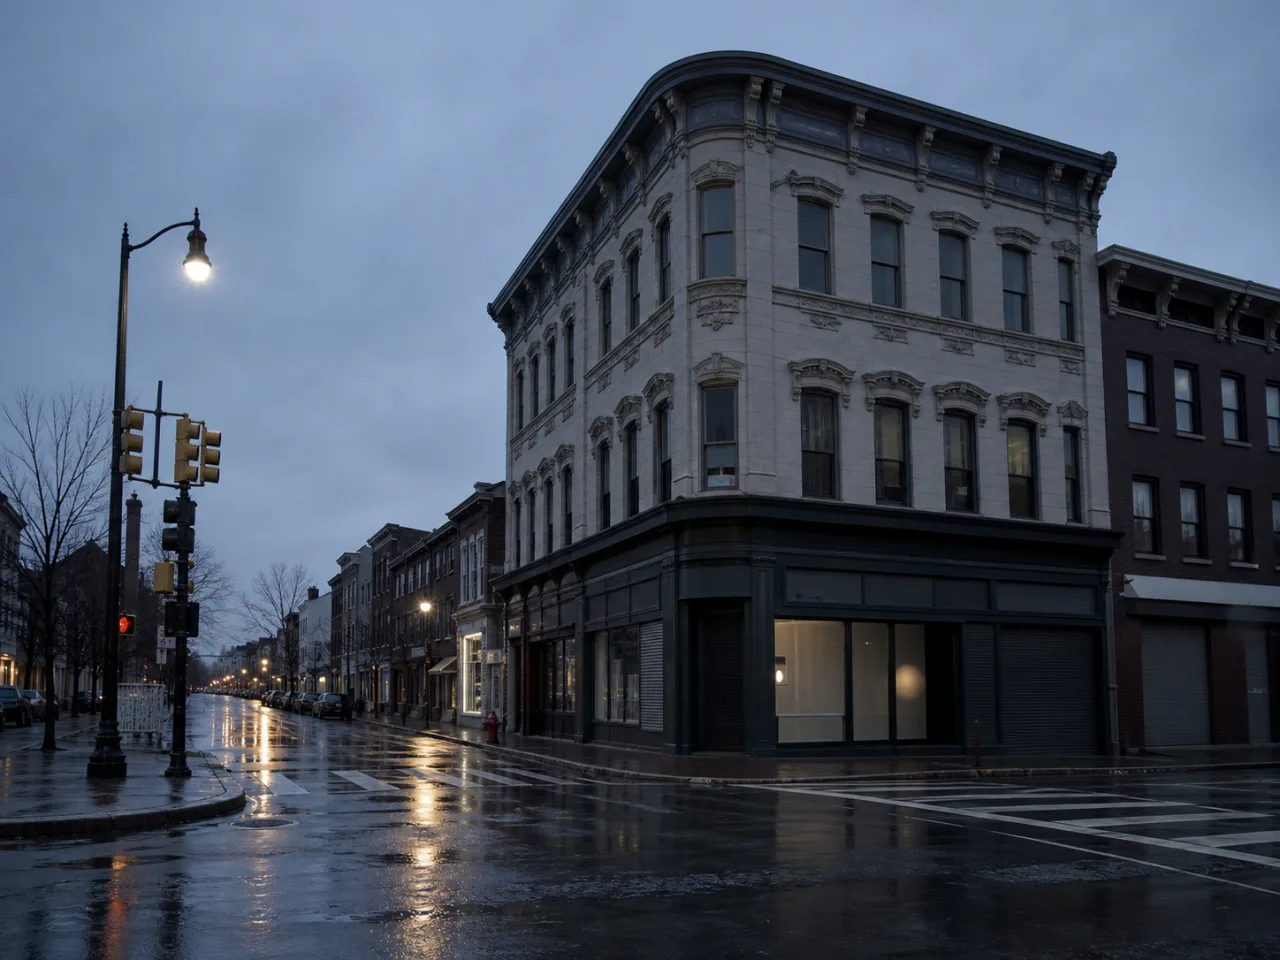
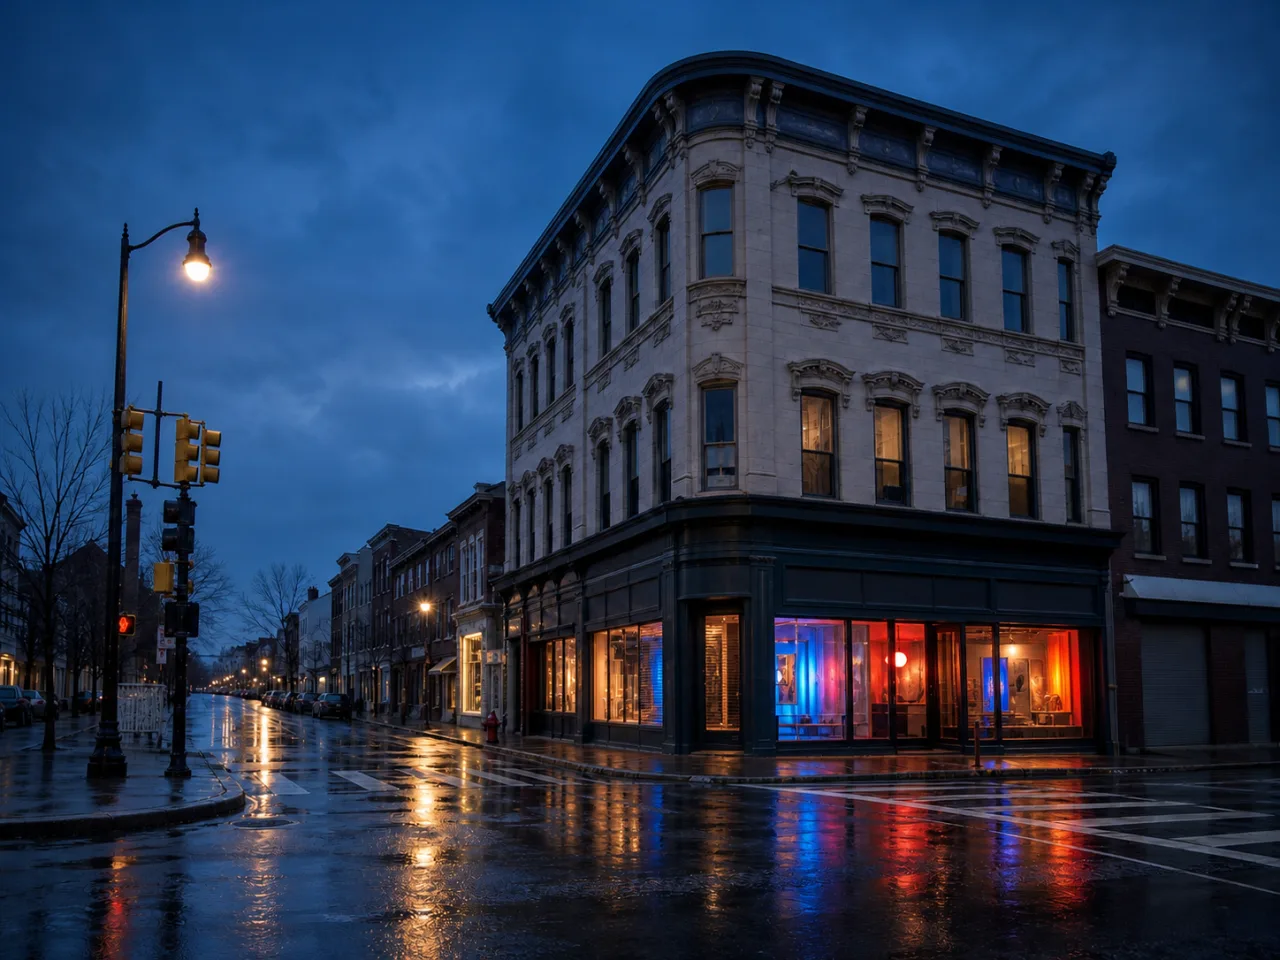
A night-scene edit can easily redesign a building when the actual goal is lighting. Treat the storefront, windows, road markings, curb, and camera angle as a preservation list. Then describe the light sources, color palette, and wet-street reflection as the permitted change. This gives the model a clearer boundary than a broad request to make the image cinematic.
PromptOpen the corner storefront as a contemporary art shop with cobalt, coral, and amber light. Strengthen wet-street reflections. Keep the building, windows, road, curb, and camera angle unchanged.
Review: Drag the comparison line across the roofline and window grid before looking at color. Check that road perspective and curb height still match. Refine a single sign or reflection only after the large geometry passes.
Case 03 Create product art direction without redesigning the product
Product edits fail commercially when the generated scene is attractive but changes proportions, hardware, materials, or labels. Put the product identity first. In the chair example, the cobalt chair, camera position, silhouette, seams, and legs are protected while the plain studio becomes a campaign set with a new platform, wall color, and harder light.
PromptKeep the cobalt chair, silhouette, seams, legs, and camera position unchanged. Replace the plain studio with a coral architectural set, an acid-yellow platform, directional light, and hard editorial shadows.
Review: Inspect the outer silhouette, leg count, seat angle, seam placement, contact shadow, and any label at full size. A traditional editor remains safer when a regulated package or exact trademark must be pixel-identical.
Case 04 Repair an old or damaged image without erasing its character
Restoration is an editing task when the goal is to remove scratches, dust, tears, or fading while keeping the people, objects, framing, and period character recognizable. Describe the damage and the photographic qualities that should continue behind it. Avoid asking the model to modernize or beautify the complete image unless that is a separate, deliberate version.
PromptRemove the visible scratches, dust marks, and small paper tear. Reconstruct the affected clothing and wall texture from nearby detail. Preserve every face, expression, pose, object, crop, monochrome tone, film grain, and original light.
Review: Compare facial proportions, hands, clothing seams, jewelry, furniture, and edge grain. Restoration cannot recover hidden truth; it generates a plausible repair. Keep the source and label the result clearly when historical accuracy matters.
Choose the right amount of AI
One editor does not make every job the same.
Use a whole-image edit
Choose the broad editor when the new request affects the scene, atmosphere, clothing, style, or several connected surfaces. Keep the instruction focused on one visual goal and include a preservation list. Save the first acceptable result before experimenting with a riskier direction.
Use marked refinement
Choose marked refinement after a usable result exists and one to five local details still need work. Give every marker one job. The markers guide attention; they do not create a hard mask.
Use a manual editor
Choose a conventional mask or retouching tool when untouched pixels must remain mathematically identical, text must be exact, or the image is used for legal, medical, identity, or regulated product evidence.
Before downloadReview the image, not just the effect
The checklist turns an attractive result into a reviewable asset. Use it on every saved version, especially when the image contains identity, text, products, architecture, transparent material, or commercial claims.
- The prompt names one primary change in observable language.
- Protected people, products, text, geometry, and camera details are listed explicitly.
- The result is checked against the source with the before-and-after control.
- Faces, hands, labels, small text, reflections, and transparent edges are reviewed at full size.
- A local problem becomes a marked child version instead of another broad rewrite.
- The downloaded result is treated as generated output and receives a final human review.